Tuesday, November 5, 2013

Potato Skins and Pig Skins

Happy Tuesday!

Tonight I'm bringing you another one of our favorite snacks for tailgating! Last night was something sweet and salty, tonight is all salty!

There's a saying I use in my kitchen a lot. CIY. What's it stand for you ask? Cook It Yourself, or if I'm feeling more gangsta I say Cook It Yoself :) Why do I say that to myself while standing in my kitchen alone? Sometimes there are foods that I'm craving like crazy, but are usually only really good at restaurants. Things like cheeseburgers, crab legs, french fries, tacos, and potato skins!


I am a sucker for a good potato skin. But the ones in the frozen section never taste great, and who has time to go to a restaurant for 3 orders of potato skins on a Sunday when there's so much football to watch?! So I stand in my kitchen and say "Elie, Cook It Yourself!". This recipe is a little time consuming, but soo worth the extra effort. These taste just like T.G.I.Fridays! And with these I'm home and can make other snacks while these cook. Win Win. (to WAY speed up the process, bake potatoes in the microwave)

Here's what I use to bake my potatoes:


Scrub your spuds well and place on a towel to dry, or pat dry with a paper towel. Pierce the potatoes all over with a fork and rub with olive oil. Sprinkle on salt and bake at 300 degrees for 90 minutes, turning halfway through. I put a baking tray under the potatoes to catch the oil that drips off.

While baking, make your bacon :)


 Let the potatoes cool, then slice in half:


Mix these:


Brush the potatoes with the seasoning:


And bake. Once cooked, pull out the potatoes and top with cheese and bacon crumbles and bake for a few more minutes. Once they're done you'll have beautiful golden brown, gooey, crunchy, amazing potato skins!
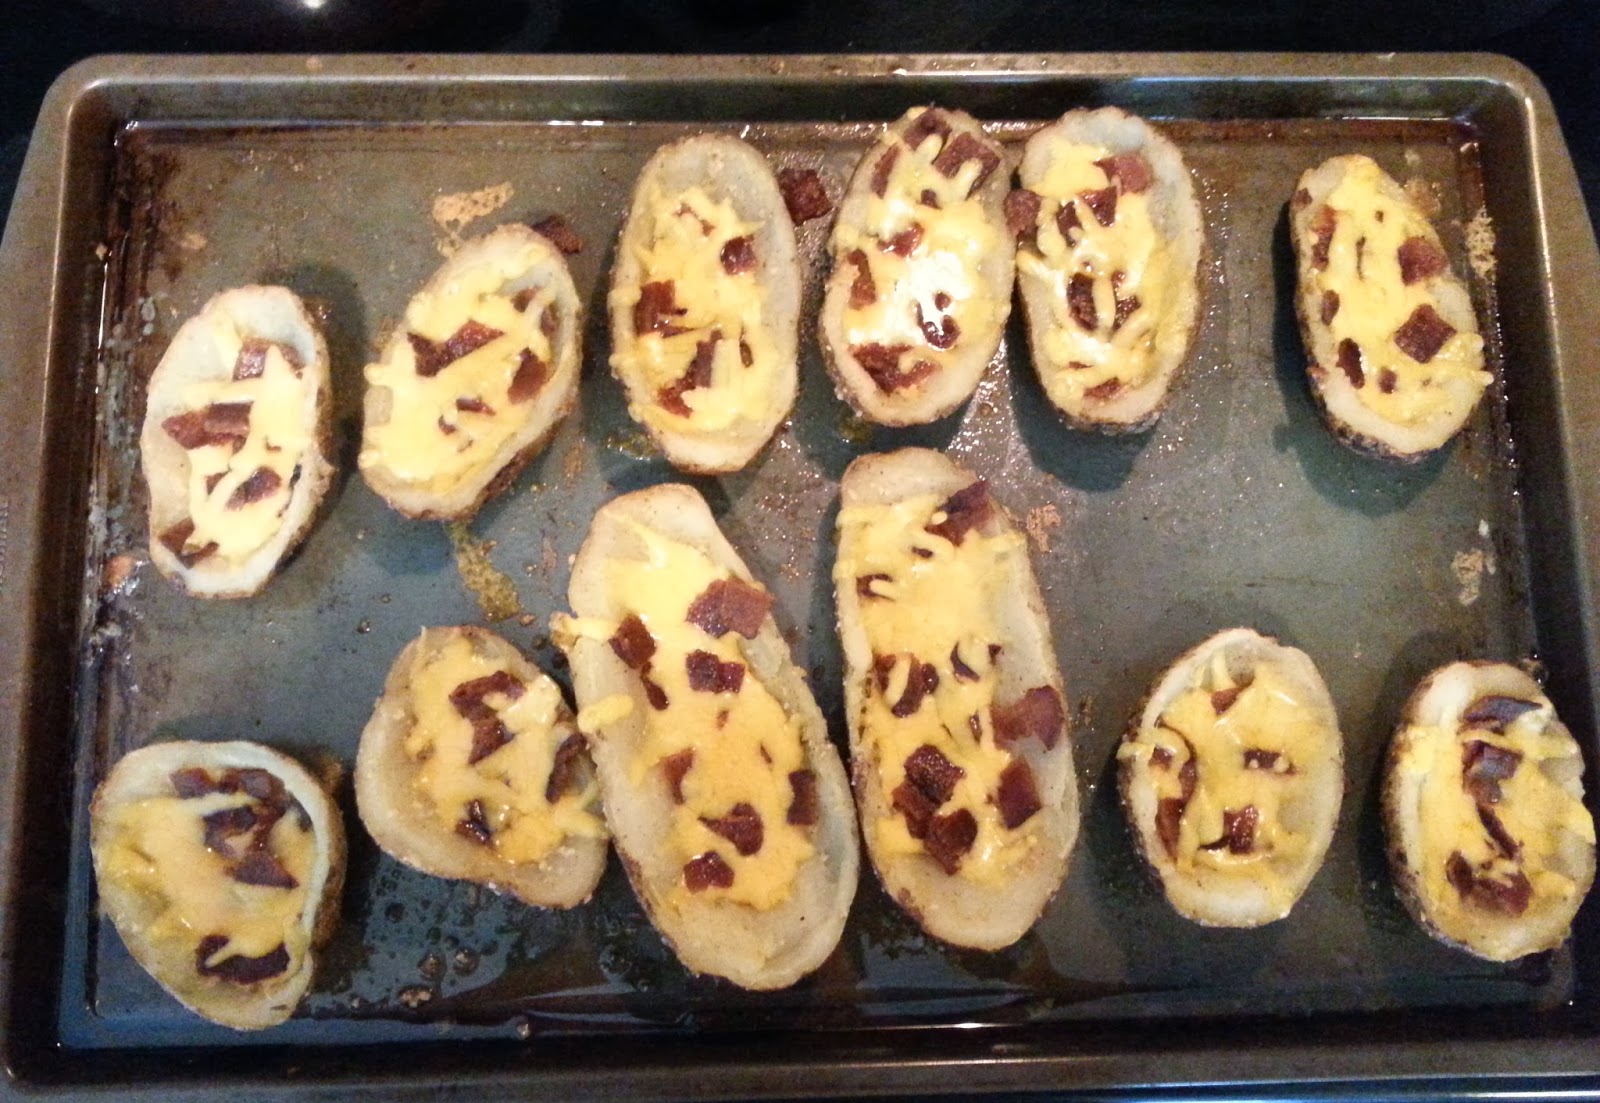

Trust me when I say these.will.go.fast! Serve with sour cream, sit back and enjoy the compliments at your next tailgating party!

Potato Pig Skins

Baked potato recipe:

6 potatoes
2 T Olive oil
1 T salt

Wash each potato under warm water. Pat dry and poke all over with a fork. Brush each potato with olive oil and sprinkle with salt. Place directly on over rack and place a large baking sheet on the lower rack. This catches any oil that falls off the potatoes while cooking. Bake at 300 degrees for 45 minutes. Turn each potato and continue to cook for an additional 45 minutes. Let cool.


For microwave potatoes:

Scrub potato and pierce all over with a fork. Place on a microwave-safe plate and cook on high for 5 minutes. Turn and cook on high 5 more minutes. Let cool.

Potato skins:

6 baked potatoes
4 T vegetable oil
1/2 tsp salt
1/4 tsp pepper
1 1/2 T Parmasen cheese
1/4 tsp paprika
4 strips of bacon, crumbled
2 C shredded cheddar cheese (less or more depending on how much you like cheese :)
Sour cream
Greens onions, sliced-optional (we don't like them so I don't use them)

Combine oil, salt, pepper, Parmesan cheese, and paprika in a small bowl. Split each potato length-wise and brush with oil mixture. Place open side down and bake at 475 degrees for 7 minutes; turn. Bake for an additional 7 minutes, or until crispy. Add the cheese and then the bacon and cook for another 1-2 minutes, or until cheese is melted. Add onions and serve with sour cream. Enjoy!


Thanks for stopping by!


Monday, November 4, 2013

Kick Off to Football Week!!

Happy Monday Everyone!

I know it's most people's least favorite day of the week, but I'm hoping my fun football foods will help start your week off a little brighter. :)

I'm starting off today with a BANG! Around here we like things sweet and salty! So our "tailgating snacks" aren't always the typical chips and bean dip. These little babies have been flying around on Pinterest and I just had to try them. I knew they'd be a perfect treat for a long day of football. Thing is, the recipe called for...wait for it...browned butter (bites nails with a big worried face)!! I've never tried brown butter before and all I ever hear is the horror stories of how bad it can go! Recipes failed. Cookies ruined. The whole family is upset.

 (Chocolate Chip Cookie Dough Truffles)

Ok I'm being a little dramatic here. So I put on my big chef pants and gave it a try. I can't even explain to you how easy it was! All the dramatics in my head for nothing! And the taste is devine! Here's a quick how-to on making browned butter in four easy steps:

Step 1:

Melt butter in medium sauce pan over medium-high heat. Whisk occasionally to help melt the butter.

Step 2:

Continue whisking occasionally while the butter starts to boil.

Step 3:

When the butter starts to foam up, start whisking rapidly. You'll notice black sediments in the bottom of the pan. Just keep whisking!


Step 4:

The foam will start to disappear and you'll see the butter has turned to brown and it will give off a very nutty aroma. You'll know it when you smell it, I promise!

Place in a heat-safe container and refrigerate for later use, or if using for this recipe, freeze for about 20 minutes.

Now that you have your brown butter, you can start with the truffles. Besides the butter, these are a no bake! And the only bowl I had to use was my mixer Ruby...gotta love that!


Begin by mixing the brown butter, brown sugar, salt, heavy whipping cream and vanilla together in a mixer. Then add the flour and more cream. Last, fold in your chocolate chips with a wooden spoon. You should have a decent sized sturdy ball of dough.


Melt the chocolate and scoop out some dough. Form dough into balls and lay on a baking sheet lined with wax paper. Drizzle chocolate over the balls and shake some salt over the top. Place in the fridge for at least an hour before serving. Bite and enjoy!


Chocolate Chip Cookie Dough Truffles with Browned Butter

Ingredients:

10 T butter (If not browning the butter, use 8)
1 Cup packed light-brown sugar
1/4 tsp salt
3-4 T heavy whipping cream, divided
1 tsp vanilla
1 1/2 Cups flour
1 Cup mini milk chocolate chips (or semi-sweet if that's what you like)
6 oz melting chocolate

Directions:

Make sure the browned butter has cooled completely. In a mixer combine the butter, brown sugar, salt, 2 T of heavy whipping cream and the vanilla on medium speed for about 2 minutes. The texture will become fluffy and light. Add flour and mix until combined. Add in 1 T cream until combined.

Stir in the mini chips with a wooden spoon. Add in the remaining tablespoon of cream, if needed. Make sure the dough is firm enough to hold up its shape. Scoop out 2-3 T of dough, roll into balls and set on a baking sheet lined with wax paper. Using a knife or spoon, dip the utensil in the chocolate then drizzle over the balls. Shake salt over the chocolate before it sets. Place in the refrigerator for at least one hour before serving.

So that's it! Did your team win yesterday? Or do they play tonight? Or Thursday? So much football! Our Colts managed an amazing victory! Go Horse!

What is your favorite dish for your tailgating party? Let me know! And thanks for stopping by!

Friday, November 1, 2013

Fall Wedding Inspiration

Happy November everyone!!

Hope you all had a wonderful Halloween! I'm already fighting the urge to get out the Christmas bins!! I think Hubby will give me crazy looks if he comes home and sees green and red everywhere...but I'm seriously fighting it!!

So when Fall comes around I will forever now think of my wedding and the amazing day that it was!


I was not a typical bride in the sense that I added a "zilla" at the end of my name, but I was totally hands on with every part of my big day. Luckily I had an amazing coordinator that was so understanding and allowed me to email/call her 17 sometimes several times a day. My event coordinator side really got to shine on our wedding day and hearing all of the compliments meant so much to me.

Since it was a fall wedding, I wanted to keep the decor related to that time of year without it being too much. I think I found a great balance. Each table had beautiful flowers in my wedding colors. Colors were red, orange, yellow and purple...perfect for Fall.


I added little pumpkins with the tables number pinned on them and bottle openers stenciled in red to tie into the wedding. We even special ordered our Hershey kisses to come in our wedding colors, and the stickers on the bottom were printed in the four colors, too! I also ordered little boxes to put the kisses and bottle opener in (Shock! Also in wedding colors :)


Our check in table was very fall and very unique. As you can see in the picture above, each person had a leaf with their name and table number on it. The leaves were stuck in pine cones and each person would take the leaf and pine cone back to their table to add to the Fall look I was going for. It was so precious! Huge props to my bridesmaids who sat their and organized all those leaves and pine cones with me!


Our sign in book was a tree and some ink pads (again Fall colors). People used their fingers and made "leaves" on our tree. It is currently hanging in our main hallway and I stop to look at it often. It's so personal and so pretty all at the same time. 


After having such great success planning my wedding and several parties since, I have decided I want to go into event planning. It's always been a passion of mine. Life is too short to spend it working at a job I hate. So I'm just going to put myself out there and become an event coordinator. I see a lot of pro bono work in my future, but that's ok. Event planning is definitely a field that you have to crawl before you walk, and I'm ok with that. Wish me luck on this new journey, and come back often to see the events I help plan and creative ideas/recipes I come up with and add to my skill set!

Got any weddings coming up? Are you weird like my sister and hate weddings? (Weird, right?!) What are some things you love about weddings? Love to hear it! Thanks for stopping by!

Thursday, October 31, 2013

A Spooktacular Event!

Happy Happy Halloween!!

Hope you all are having a hauntingly great day! In Indiana we are getting soaked and Trick or Treating has been pushed to tomorrow. Many people I know keep saying "When I was their age I was out rain or shine, snow or hail!". Apparently things don't work like that anymore.

One thing that is the same is the joy of hosting a Halloween party with close friends and family! That's what was happening up in here last weekend. I wanted to share with you all some of the fun things I made to make it a spooktacular event!!


First thing I did to plan my party was set a budget. Very important step! Then, being as OCD as I am, I made lists. Tons of lists. Lists for what I wanted to make, the recipes for each thing I wanted to make, what I had to get at the grocery store, and a list of what I already had. Exhausting, right? But necessary!

I even made a diagram of where everything would go on my kitchen island. I had to because I was afraid I'd need a bigger table :) Since the party was on Saturday I decided to make most of the food on Friday. That way, if anything didn't turn out right, I had plenty of time to fix it. First I made my dirt pudding. I didn't put the decorations on until right before the guests came. Here's a shot of the "Dirt" and the recipe I used.


Dirt:
8oz cream cheese-room temperature
1/2 Cup butter-room temperature
1 Cup powdered sugar
2 boxes french vanilla pudding
3 1/2 Cups cold milk
12oz cool whip
1 lb oreos

1. Mix cream cheese, butter and sugar in your mixer until smooth. I used Ruby.
2. In a separate bowl beat the pudding and the milk until mixed and thickened.
3. Fold in cool whip, then stir in cheese mixture.

That's it! I spread it in a 9x13 pan and chilled over night. The next day I scooped it into tiny cups and added the Oreo crumbs to the top. The "graves" are milano cookies with black icing. The gummy worms and pumpkins were great decoration additions :)

Then it was onto all things chocolate covered. I made Oreo eye balls, nutter butter mummies and strawboory ghosts (not pictured, people ate them too fast!)


The eye balls were:
1 lb oreos (crushed into crumbs)
1 8oz cream cheese-room temperature
1 16oz white chocolate
Shortening

Crush oreos and smoosh together with cream cheese. Form into balls and stick toothpicks in them. Place on a cookie sheet and freeze for about 30 minutes. Then melt white chocolate on the stove top on low. Add shortening as needed so you get that nice shiny look. Dip each ball into chocolate and put back on cookie sheet and place in freezer until hardened or ready to serve.

I took mine out of the freezer about 2 hours before everyone came. Once they had thawed a little I pulled out the toothpicks and put a chocolate chip where the pick had been, put wiggly lines up the sides with red icing and TA DA! Eyeballs! I used two more packages of white chocolate for the strawberries and nutter butters. Just dip them in and pop them in the freezer. So easy!

Next were the Death by Chocolate cupcakes courtesy of Sally's Baking Addiction.
I followed her recipe to a T! They were amazing on Friday and perfect on Saturday! I added some "bloody knives" I picked up from Meijer and used my favorite icing recipe for the top! You can (barely) see them in the picture at the top!

Other fun things were my Brain Balls (in the black container), Witches Brooms (in the orange) and Mummy Dogs (not pictured). All of these were made/assembled on Saturday.


I really wanted a picture of the Mummy dogs, but I literally set them out, walked away for maybe five minutes, came back and they were all gone!! I mean I made 32 of them and they disappeared! Here's the recipe:

1 package hot dogs
1 can crescent sheets
4 slices sharp cheddar (or whatever your favorite sliced cheese is)

Cut the hotdogs in half length wise, then cut each half in half. Make sense? Good. Cut each cheese slice into eight skinny pieces and cut the crescent sheet into thin strips. I found a pizza cutter worked the best. Put a piece of cheese on each hotdog then wrap with the crescent strips. Bake at 350 degrees for about 11 minutes. Let cool and serve! Trust me they will go fast!!

I think my favorite part of the setup was my "puking pumpkin"! He was so gross and so cute all at the same time!! Love it!


I'll leave you with a few pics of my favorite Halloween pictures. I love that my friends totally got into the party and dressed up! My sister and her boyfriends beer pong table costume was my favorite!


So how are you celebrating Halloween? Did you actually get to trick or treat on Halloween? Hope whatever you're doing you and your family are having a great (and safe) Happy Halloween!